Sunday, March 27, 2016

Making our own Wine Crate


My husband was at the wood store and found some neat oak with worm holes.  He thought it'd make a fun box, so he got to work making a wine crate.


He used the wormiest part of the wood to make the top.

When he finished, we set it downstairs and kind of forgot about it....

I received a Cricut machine for Christmas and was eager to make something with it.  I then remembered the wine crate...

I put a dark stain on it then let it sit for a few days.


I found a label that I liked and kind of copied it, but with my limited Cricut skills, I used graphics from their site to make it my own. 


I think it turned out pretty neat!


 Thanks for your visit!

Pam


I am linking to the following parties:
 
 
Dwellings-The Heart of Your Home


Sunday, March 6, 2016

Adding the Finishing Touch to the Laundry Room--A Sliding Barn Door

 
The laundry room project is now officially done with the addition of the barn door! 


The old laundry room had a door that swung in (and took up a lot of room!)  Our friend wanted a custom door on a barn door slider. 


My husband got to work.  She lives in a 100+ year old house and wants the old style doors throughout. 


He made this door and left the opening for glass.  She chose seeded glass which adds some privacy.


We installed the barn door hardware purchased from Amazon. 


 This was my first attempt of a vinyl cutout with my new Cricut machine.  I think it turned out pretty snazzy!


The new door keeps the sounds from the washer and dryer down and looks fab! 


Here's her redone laundry room.  It really turned out great!
 
Thanks for your visit!
 
Pam


I am linking to the following parties:
 
 
Dwellings-The Heart of Your Home


Saturday, February 13, 2016

We CLEANED UP in this Laundry Room Redo!


We recently completed another project for our friend.  She wanted to redo her laundry room.  Yes, it was in serious need of a redo!


Here is what we started with: 


We pulled everything out and took the washer and dryer off their pedestals.  We made platforms for them to sit on, then added moulding around the edges.  We attached the moulding with Velcro.  It pops off and the washer and dryer can easily be brought down from the pedestals.  We also added pads to the bottom of the pedestals so they can slide out to access everything.
 
 
While we were halfway through the project, her washer died. What timing!  :(
 
We added beadboard, dark grey paint and chair railing to the walls, a new light fixture and new dark flooring.
 
 
A new cabinet and shelves up above keep the supplies hidden and provide a place for some cute accessories.


A plain door from Home Depot was cut and painted to provide a place to fold and set clothes.
 
I think it turned out SO cute! 


 Thanks for your visit!
 
Pam


I am linking to the following parties:
 
 
Dwellings-The Heart of Your Home


Saturday, December 26, 2015

Making a Cute Pillow Using a Placemat


I've made pillows out of dishtowels, placemats, grain sacks and drop cloths.  (Yes, I have a lot of pillows!)  :)    Making one from a placemat is the easiest way! 
 
Find a placemat that you love.  Make sure it has two layers.  I found four of these at Kohl's on clearance and paid $4 for all of them.
 
Pull the thread from about 4" on one side.  (enough to fit your hand in) 
 
Fill with batting. 
 
Sew up 4" where you pulled the thread, either by hand or with a machine.
 
Woohoo!  A new, cute pillow!


Thanks for your visit!
 
Pam
 
 Thank you to those who entered the Rockwell Tool Giveaway.  HilLesha was the winner!


I am linking to the following parties:


Dwellings-The Heart of Your Home


Friday, December 18, 2015

Just in Time for Christmas! A Rockwell Tool Giveaway!

I am so excited about this giveaway!  Rockwell Tools is offering one of my lucky readers a Sonicrafter F50.  I tried it out recently when we helped a friend put in a wood floor in her 100+ year old house.
This tool is powerful!  It cut through everything we threw at it!   We had to cut out some old wood, some old tile and some parts of the floor that were under the sheetrock.  It took care of all of these things easily!


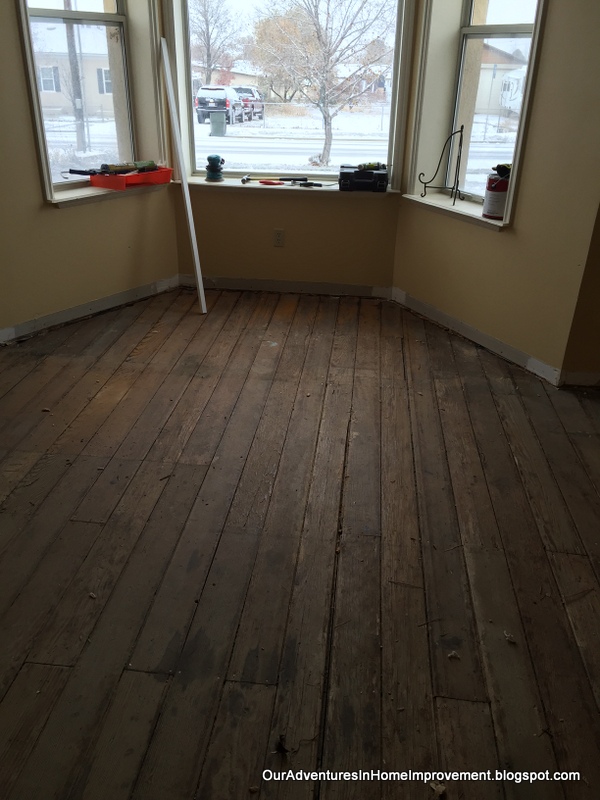
Here's the floor that was under a layer of carpet and subfloor.  It's 100+ years old and appeared to be made of fir.  We originally thought it could be lifted up, sanded, then put down on a new subfloor, but there were hundreds of nails throughout the boards and they splintered when trying to lift them.  Ok, onto Plan B--laying new subfloor on top of the fir, then laying a new wood floor.  Our first step was  making sure everything was even.


Between her two rooms, there was a threshold made of sandstone.  Over that was a layer of tile that needed to be removed.  Enter the Sonicrafter F50 and it was soon history!


 The tool cuts up and down or flat.  It really does the job quickly!


This is where the old subfloor was uneven under the sheetrock.  We used the the tool to cut these edges off right at the edge of the sheetrock.  Viola!

Once we had all of the edges cleaned up, we were able to lay the new subfloor.
Stay tuned for the rest of the project!
So, onto the GIVEAWAY!
On Saturday, December 19, I will use Random Number Generator to pick the winner and they will win their own Sonicrafter F50!
Rules are pretty simple:
  • You must be a follower of my blog
  • Leave a comment telling me what project you're working on that could use a Rockwell Tool. 
  • Only one entry per person
Thanks for your visit! 
Pam

I received a tool to try out.  All of my opinions are my own.