Showing posts with label paint. Show all posts

Friday, April 19, 2013

New Carpet Brings on a Table Makeover


I bought a pine table a few years ago to put in my office. I collect typewriters and adding machines and wanted a place to display them. This table wasn't the perfect size, but it was $30 and I figured we could make it work. So we 'made-do' with it until a couple of weeks ago when we had to clear the room out for new carpet. 
 
Here it is right before my husband started working on it...  It was all this color and quite large.  (I looked and looked for a 'before' picture, but I guess I always knew it wasn't right and didn't take any pictures!)


After he cut off 12" from the width, he routed the edges and sanded everything down.


He primed all of the lower pieces.


Then several coats of white paint were applied.


The top got stained.


 Then everything got put back together.


Bailey had to be right in the middle of the action...


The new size works so much better in this room.  I love the dark top too!


Thanks for your visit!


Pam


I am linking to the following parties:


Dwellings-The Heart of Your Home

Sunday, July 8, 2012

Dresser Transformation & Homemade Drawer Pulls


A couple of weeks ago I was out garage saling and came across this dresser for $10.  It was sturdy and was in decent shape.  Sold!


We reinforced the drawer bottoms so they would be strong.


I lightly sanded everything.

I wiped all of the dust off with a microfiber cloth.


 I applied a light coat of primer using a little foam roller.  It was EASY!


I used Minted Lemon paint from Home Depot. 


I again used the foam roller and it went on smooth!

It was HOT yesterday, so the paint dried very quickly.  I put two coats on everything.


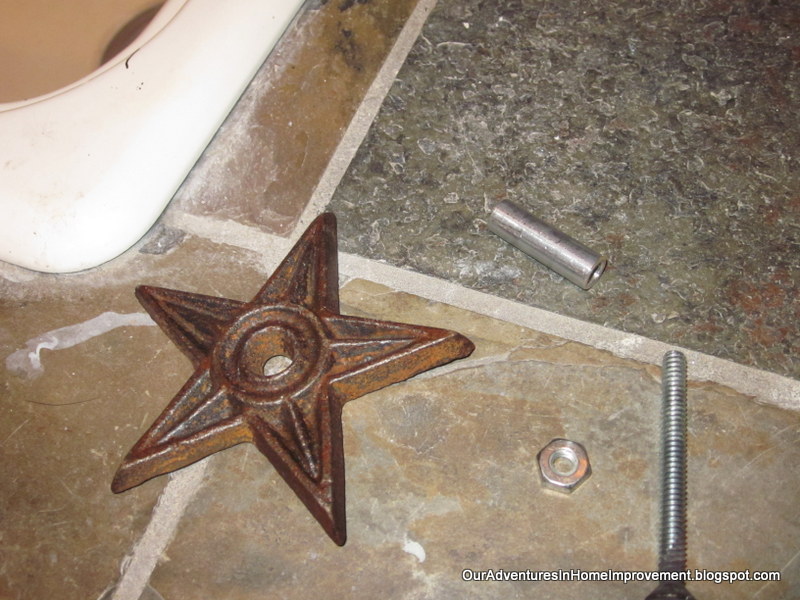
I bought these stars years ago.  With the hole in the center, I knew they'd be perfect for drawer pulls.

Using a long screw and a 1" metal extender (my husband says it's called a ferrule), I was able to make my own. 


Because I was using a silver bolt and a rusty star, I wanted to make the bolt look like it belonged there.  I dipped the head of the bolt into the Perma Blue and it was dark.  (magic!!)  I could have made the extenders dark too, but since they really aren't seen, I didn't do them.


I thought about stenciling numbers on each drawer, but think the dresser is decorated enough right now with the star pulls. 


I put the decorated Coke crate on it along with a birdhouse.  I will have to move the flag art up a bit, but haven't yet...


 Thanks for your visit and comments!

Pam


I am linking to the following parties:


Jennifer Rizzo's Fabulously Creative Friday

DIY Show Off
>


My Uncommon Slice of Suburbia

Sunday, February 5, 2012

Updating an Ugly Box with Graphics and Paint


My husband had a box in the garage that originally held a car waxing kit. The box was sturdy and a great size, but not very cute!  :)


I started with a Graphics Fairy label.


I tried to 'age' it with tea.  I really didn't have to do this step, as it didn't make a huge difference.


I painted the box with a couple of coats of green spray paint.  


I then sanded down the edges.


I cut close to the edge of the graphic, then mod podged it on the box.


I put an antiquing gel on the whole thing, then rubbed off the excess.  They used to sell a one-bottle antiquing gel, but now you buy the Martha Stewart Antique Effect and mix it with any color you want.  I mixed it with the color Vanilla Bean.  I bought both of these bottles at Michael's.  I mixed them together with equal parts.


I added a knob so it's easy to open.  I now have a great place to store my weekly ads and coupons.


Thanks for visting!

Pam


I am linking to the following parties:


UndertheTableandDreaming The Graphics Fairy