Tuesday, April 4, 2017

Our New Kitchen Sink--Yes, a New Post Finally!


I knew it'd been awhile since I'd last posted, but holy smokes, a year???  If you're reading this, thanks for sticking with me!


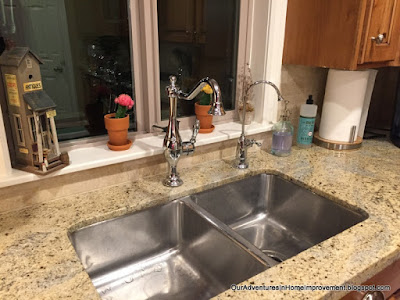
We had a stainless steel sink in our kitchen and never loved it.  I had been researching farmhouse sinks, but didn't want to lose my little pull outs in below my sink and didn't want to have to have someone come and cut the granite. ($$$)  And really, I didn't want to spend $800 or so for the sink....  I think I got the next best thing-a great big, beautiful cast iron sink that looks great with our existing cabinet!  And this sink was around $220 at Home Depot!  It's a Kohler Cape Dory.  If you're going to put it in an existing kitchen, I'd recommend calling Kohler and asking for a template.  They were extremely helpful and we had the template in a few days.


We started by attempting to remove the old sink.  It was a much bigger job than we expected.  It was sandwiched between plywood underneath and the granite on top. 


And it was LOUD and MESSY!! 


In the end, we were able to use a sawsall to cut it and push it out. 


We were fortunate that the granite didn't need polished edges  because  the lip of the sink would cover all of the cuts.

Once the old sink was out and the new cuts were made using the template, we set it on one foot pieces of 2x4 on each edge, then my husband got under the sink and carefully lifted while I pulled out the wood pieces.


Henry is always a good helper!


We then installed the faucet which I LOVE!  We buy Moen faucets because they are beautiful, but also because they have a lifetime guarantee. 
This  sink comes with four holes.  We used one for the faucet, one for the sprayer, one for filtered water and still had one.  Score!!  We were able to put a button in for the garbage disposal that fit the hole on the left perfectly and now I can easily turn the disposal on without fumbling under the counter for the correct switch.


I purchased the grate for the bottom of the sink so that I could protect it from heavy pans, etc.  I found it on Amazon. 


Now the kitchen is complete and I am very happy! 

Thanks for your visit!

Pam


This post isn't sponsored by any of the companies listed above.  I just love the products and those companies! 


Sunday, April 3, 2016

Redoing an Old Gumball Machine


A few months ago I found an old gumball machine on our local Craigslist.  It looked plain, but old.  I was very happy to see that the body was made out of glass. 


My husband took it apart, cleaned it up, painted it and put it back together. 


Here it is all cleaned up and put back together.  I am loving the new look!

Thank you for your visit!

Pam


I am linking to the following parties:
 
 
Dwellings-The Heart of Your Home


Sunday, March 27, 2016

Making our own Wine Crate


My husband was at the wood store and found some neat oak with worm holes.  He thought it'd make a fun box, so he got to work making a wine crate.


He used the wormiest part of the wood to make the top.

When he finished, we set it downstairs and kind of forgot about it....

I received a Cricut machine for Christmas and was eager to make something with it.  I then remembered the wine crate...

I put a dark stain on it then let it sit for a few days.


I found a label that I liked and kind of copied it, but with my limited Cricut skills, I used graphics from their site to make it my own. 


I think it turned out pretty neat!


 Thanks for your visit!

Pam


I am linking to the following parties:
 
 
Dwellings-The Heart of Your Home


Sunday, March 6, 2016

Adding the Finishing Touch to the Laundry Room--A Sliding Barn Door

 
The laundry room project is now officially done with the addition of the barn door! 


The old laundry room had a door that swung in (and took up a lot of room!)  Our friend wanted a custom door on a barn door slider. 


My husband got to work.  She lives in a 100+ year old house and wants the old style doors throughout. 


He made this door and left the opening for glass.  She chose seeded glass which adds some privacy.


We installed the barn door hardware purchased from Amazon. 


 This was my first attempt of a vinyl cutout with my new Cricut machine.  I think it turned out pretty snazzy!


The new door keeps the sounds from the washer and dryer down and looks fab! 


Here's her redone laundry room.  It really turned out great!
 
Thanks for your visit!
 
Pam


I am linking to the following parties:
 
 
Dwellings-The Heart of Your Home


Saturday, February 13, 2016

We CLEANED UP in this Laundry Room Redo!


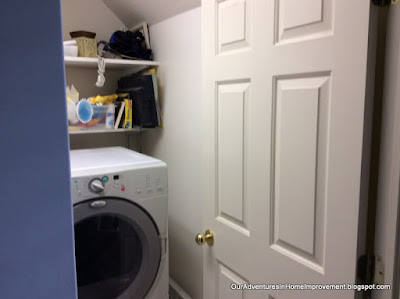
We recently completed another project for our friend.  She wanted to redo her laundry room.  Yes, it was in serious need of a redo!


Here is what we started with: 


We pulled everything out and took the washer and dryer off their pedestals.  We made platforms for them to sit on, then added moulding around the edges.  We attached the moulding with Velcro.  It pops off and the washer and dryer can easily be brought down from the pedestals.  We also added pads to the bottom of the pedestals so they can slide out to access everything.
 
 
While we were halfway through the project, her washer died. What timing!  :(
 
We added beadboard, dark grey paint and chair railing to the walls, a new light fixture and new dark flooring.
 
 
A new cabinet and shelves up above keep the supplies hidden and provide a place for some cute accessories.


A plain door from Home Depot was cut and painted to provide a place to fold and set clothes.
 
I think it turned out SO cute! 


 Thanks for your visit!
 
Pam


I am linking to the following parties:
 
 
Dwellings-The Heart of Your Home