Showing posts with label backyard. Show all posts

Friday, May 29, 2015

A New Entrance to the Backyard

 
We have recently redone both sides of the backyard.  Last week I showed the arbor we put in HERE.  This project is where we added a path, DIY curbing and a new planter.  Now we have the entrance to the backyard that we always wanted!


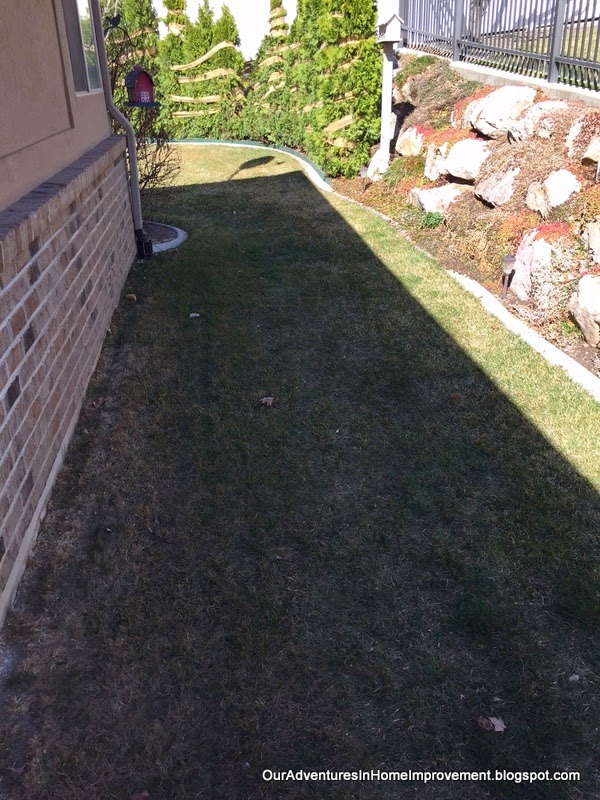
Here it is in March. 

After we added the arbor, we tore out about a third of the grass.


I wanted to keep the grass here so I could get the mower to the backyard.  Well, setting pavers is a lot of work.  Setting pavers in cutouts of grass is a TON of work!!  My back and hips are just now getting back to feeling normal...

We added the forms to make our own curbing.  I called around and the minimum charge for curbing was $275.  Since we only needed 20 feet, we decided it wouldn't be worth almost $15 a foot to have someone come out.  Instead, we bought boards and concrete mix and did it ourselves for $24.  And I think it looks just like the professional curbing!


We left the forms on for 24 hours.
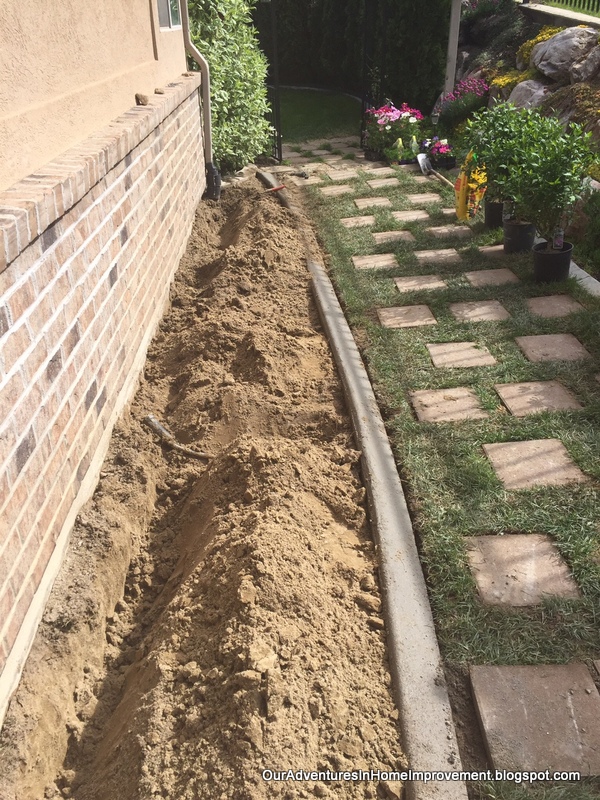
 

We then added a couple of new sprinklers to the planter.


And lots of flowers--Rose of Sharon, Peony (already blooming!), Cosmos, Daisies, Lamb's Ear, etc. and of course a birdhouse!


It shouldn't take too long for the grass seed to fill in the empty spaces. 
 
 
Thanks for your visit!
 
Pam


I am linking to the following parties:


Dwellings-The Heart of Your Home


Sunday, May 17, 2015

A New Arbor for the Backyard


I've been wanting to work on the entrance into our backyard for a few years now.  Recently, we redid the west side of the backyard. HERE.   Now it's time to do the east side.


We started with this.  Of course this was several weeks ago, so everything was still looking drab during the winter...


We dug up an area and decided to use the same pavers that we used for the other side of the backyard.  Of course we have our trusty new helper, Henry! 


We have really bad winds at times here, so we needed to make sure the arbor would stay put.  These 8" tubes were the smallest that Home Depot had.  We thought about using 4" pipe, but it was significantly more expensive.  One 4 foot tube did the trick for the four footings.


We mixed two bags of concrete mix in the wheelbarrow and filled the tubes.  (then it rained for 6 days!)

 
After a week, we drilled holes in the footings and put concrete anchors in.  The arbor was then attached to those.


Once again, our trusty helper...  :)


We used bags of paver sand for the base and carefully made sure every paver was level itself, then level with all of the pavers next to it. 


We'll let the sand settle in (more rain coming this week!), then I'll add soil and plant ground cover between the pavers.  That will soften the look.
 
I've added a clematis on the left and some cosmos on the right.  We'll see about hanging some baskets until the clematis takes off to add some color.


We're so happy with the entrance now!


Thank you for your visit!
 
Pam


I am linking to the following parties:


Dwellings-The Heart of Your Home


Sunday, May 3, 2015

Shady Spots for Summer


It gets really hot here in the summer.  It's so nice to have a shady spot to sit in the heat of the day.  Recently I was on Hometalk and found these inspiring spots to relax and stay cool.  Check out my Hometalk clipboard HERE.


Of course, my favorite is the one in my own backyard.  :)


Thank you for your visit!
 
Pam


Sunday, June 15, 2014

Comfy Addition for the Adirondack Chairs


My husband recently made footstools to go with the Adirondack chairs that he made a couple of years ago.  We added this spot this spring for the chairs and now it's our favorite place to hang out early in the day. 


We also added these chestnut colored pads from Home Decorators.  They fit the chairs perfectly! 

 
It's a great spot to listen to the water in the pond and see a different view of the backyard.   


The birds in the birdhouses right there aren't too thrilled with us sitting nearby, but they eventually settle down.


Ahh, we sure love spring and summer!
 
Thank you for your visit!


Pam


I am linking to the following parties:


Dwellings-The Heart of Your Home

DIY Show Off


Sunday, September 8, 2013

Adding a Little Character to a Rickety Vinyl Fence


Around part of our backyard, we have an off white vinyl fence.  It's been rickety since we moved in, but it wasn't falling down and my husband said he didn't want to deal with it unless it fell down.  I was not happy about that, especially since our pond is right there and my plants are getting bigger each year.  I also have several birdhouses around that area and didn't want to lose any. 
A few weeks ago we had some very big gusts.  We came outside to see the big white and green birdhouse on the ground where the fence had swayed enough to knock it over.  Ok, that was IT!  Time to tighten up that baby!
We found out that not only do we have an unstable fence, but the neighbors on the other side have an identical fence that is just as wobbly and touches our fence!  So each time the canyon winds would blow, both fences would rock back and forth.  (ugh!!)  When we took some parts down and lifted up the 'post', it was just sitting on the concrete.  No cement inside, no brackets, nothing!!  No wonder it moved like crazy!


We started by digging down in the dirt next to the cement wall.  We dug down about 15" for each of the three posts.  There was concrete down there, so we couldn't dig deeper.  We drilled holes (meaning he drilled holes...), then attached anchors through the new 4x4 into the concrete wall.  We then poured concrete in each hole. 


The next day we attached brackets between the new 4x4's and vinyl 4x4's.  The funny thing was that the vinyl fence was SO un-level, that we were sure our boards were off, but lo and behold, the new ones were perfect. 
We put lattice between two of the new 4x4's and planted vines.  We put the birdhouse back up  and are very happy with the results.  Last week we had strong winds again and not a bit of creaking anymore!  Success!! 

We didn't add lattice to the other section because of the slope of the hill that it's on.  There just wouldn't have been enough lattice to work with to look right.  Instead, we hung a birdfeeder there and will patiently wait for the Weigala and Rose of Sharon that are right there to grow and cover the area.


We spent two days and about $200 and now have a sturdy fence.  It certainly saves us from the huge expense of putting in an entirely new fence along that wall.  And, now I have more places to plant!
Thank you for your visit!
Pam