Our friend's mudroom project is just about done! She's spending all weekend caulking and painting. And believe me, there's lots and lots of caulking and painting to do! :)
When we started this project a few months ago, it began with her wanting to replace her back door. It morphed into a complete overhaul of the room and it looks FAB!
You can see Part 1--The Pantry HERE
New drop ceiling.
New insulation.
New tongue and groove pine on the ceiling, new light fixture.
This room was an add-on to her 100 year old house. The old window needed to be replaced.
This is the view out of that window...
Yes, that view should not be covered up!
New tile, new window in, new moulding, new green paint.
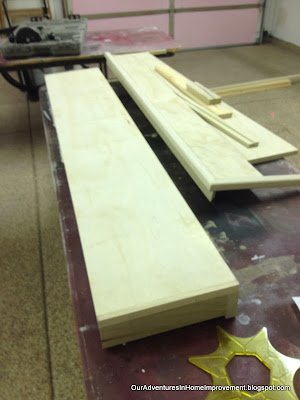
The benches and shelf in process.
Dealing with a 100 year old house adds some extra work. The original walls are made of sandstone. To secure the benches, special anchors needed to be installed into the sandstone.
Adding the board and batten using spacer blocks to make sure everything was even.
Making it work around the light switches.
The new tile floor.
The new pantry on the other side of the room.
Here's the new room prior to the final painting and before adding hooks under the shelf. The best part is that she and her kids love it!
When it's all complete, I'll be sure to share more.
Thanks for your visit.
Pam
I am linking to the following parties:
Inspire Me Tuesday at A Stroll Thru Life


Read more at http://diyshowoff.com/buttons/#VVhCLrYhsyVpUHXW.99


You guys are the best friends ever.
ReplyDeleteLove it!
It makes me wonder if the deer go on the trampoline? Would love to see that! Ha Ha!
Looking soooooo good Pam...Can't wait to see it all finished!
ReplyDeleteThat looks wonderful! Amazing transformation...love the view. I think the board and batten is a great look for a pantry- mudroom.
ReplyDeleteNow...Q &A
is that a trampoline...and is there a HOLE underneath it?
Because I think that is an amazing idea...I'd love to know more about this.
My daughter is wanting to get a trampoline for my littles next door... but I want them to be safe!!!
Pat
Thanks Pat! Yes, the trampoline is set into the ground. I think they are easier to get on and off and probably safer since they are at ground level. I love the idea of adding pool noodle pieces over the springs too. :)
DeleteYour mudroom is looking so great! Love your attention to detail - the board and batten, tongue and groove, light fixture... So lovely!
ReplyDeletePam, I can't believe all the progress you are making and it looks fantastic.
ReplyDeleteWhat a nice friend you are! It's looking great! I love that in ground trampoline too!
ReplyDeleteWow, that was some undertaking. It looks great and certainly fits with a 100 year old house and some great added space! High five!
ReplyDeleteCarol
It looks amazing....I love it!
ReplyDeleteOh how gorgeous!!!
ReplyDeleteWe just bought an old house with a mud room that's basically falling apart - this would be such a beautiful idea!!!
Thanks for sharing - visiting from Coastal Charm
Hugs from Montreal
xxx
Wow! Looking great! Would love to have that much space for a mud room/pantry!
ReplyDeleteLooks like LOTS of work, but it looks GREAT. Love the board & batten and the corbels. Glad she kept the window, too!
ReplyDeleteYou had me at "board". Love board and batten. Neat idea to use a spacer. I'll have to remember that. Better yet, I'll pin it!
ReplyDeleteSuper job you are doing Pam. I wish it was my home. Oh how I'd love to have a mudroom in my 100 year old home :)
ReplyDeleteLooks awesome, Pam! Popping over from Wow Us Wed and so glad I did! Your adventures in home improvement is lovely!
ReplyDeleteCheers to you and yours,
Therese @ Fresh Idea Studio
Looking good...luv the ceiling and that light fixture.
ReplyDeleteBlessings,
Linda
wonderful transformation.. Good job!
ReplyDeleteHi! First visit to your blog! This is becoming a to be a pretty mudd room...so peaceful & pretty looking out the window! Have fun, will visit again!
ReplyDeleteLove you to visit me sometime!
Have a lovely Sunday!
Gail
http://www.casualloveselegance.blogspot.com
I have seen part 1 and part 2 both and its been really fun to watch these parts its really informative and interesting postings by you,
ReplyDeleteThe new tile floor tiles are looking really fabulous.Final paint of white color under the shed is also looking great. Seems that the whole work is done under the professional of homer remodeling company.
ReplyDeleteThis is a great article and it looks like your home improvement process was a big one. I really like the new tile you put it, that really turned out great. My family and I just had a new house built last summer and the process was long but definitely worth it. We really like Custom Smart Homes so that's the style my wife and I chose. The project did not take that long and we got to customize the house to our every liking. Also, it is better for the environment so that makes us feel good. Thanks for the post, great pictures!
ReplyDeleteI enjoyed reading your entire post and looking at the pictures of this project. Your chosen tiles look neat. They seem to be very easy to clean with just a damp mop. The pantry looks organized and spacious enough to hold extra items. This a great post that is worth-sharing.
ReplyDeletenice post.. I wish it is my home
ReplyDeletewow! looking great!
ReplyDelete